

There are a few ways signatures can be added to documents in the Cloud Contracts 365 platform. Whether that is for extra signatures to an existing document, or signatures on a new document being uploaded to the platform.
Below details how this can be done:
Add signatures via smart tags
You can add signatures to documents that you are uploading using smart tags that are identified by SignNow and configured for you.
To use these, you will need to add the tags in the following example, replacing the highlighted elements with either a business or an individual's name. (Please note: These tags must be left-aligned, and names must be unique for each signee)
Example:
Signed: <ESIGNATURE Type=“Signature” Recipient=“<PARTY_A_NAME>“>
Name: <ESIGNATURE Type=“Text” Recipient=“<PARTY_A_NAME>”>
Position: <ESIGNATURE Type=”Text” Recipient=”<PARTY_A_NAME>">
Date: <ESIGNATURE Type=”Date” Recipient="<PARTY_A_NAME>">
Once these have been added and the document uploaded, when you click 'Send for Signature' from the Signatures tab, the signers will be identified automatically.
Manually add signatories
For documents uploaded from outside of Cloud Contracts 365 or those that simply need an extra signature, you can easily add these through the SignNow portal.
-
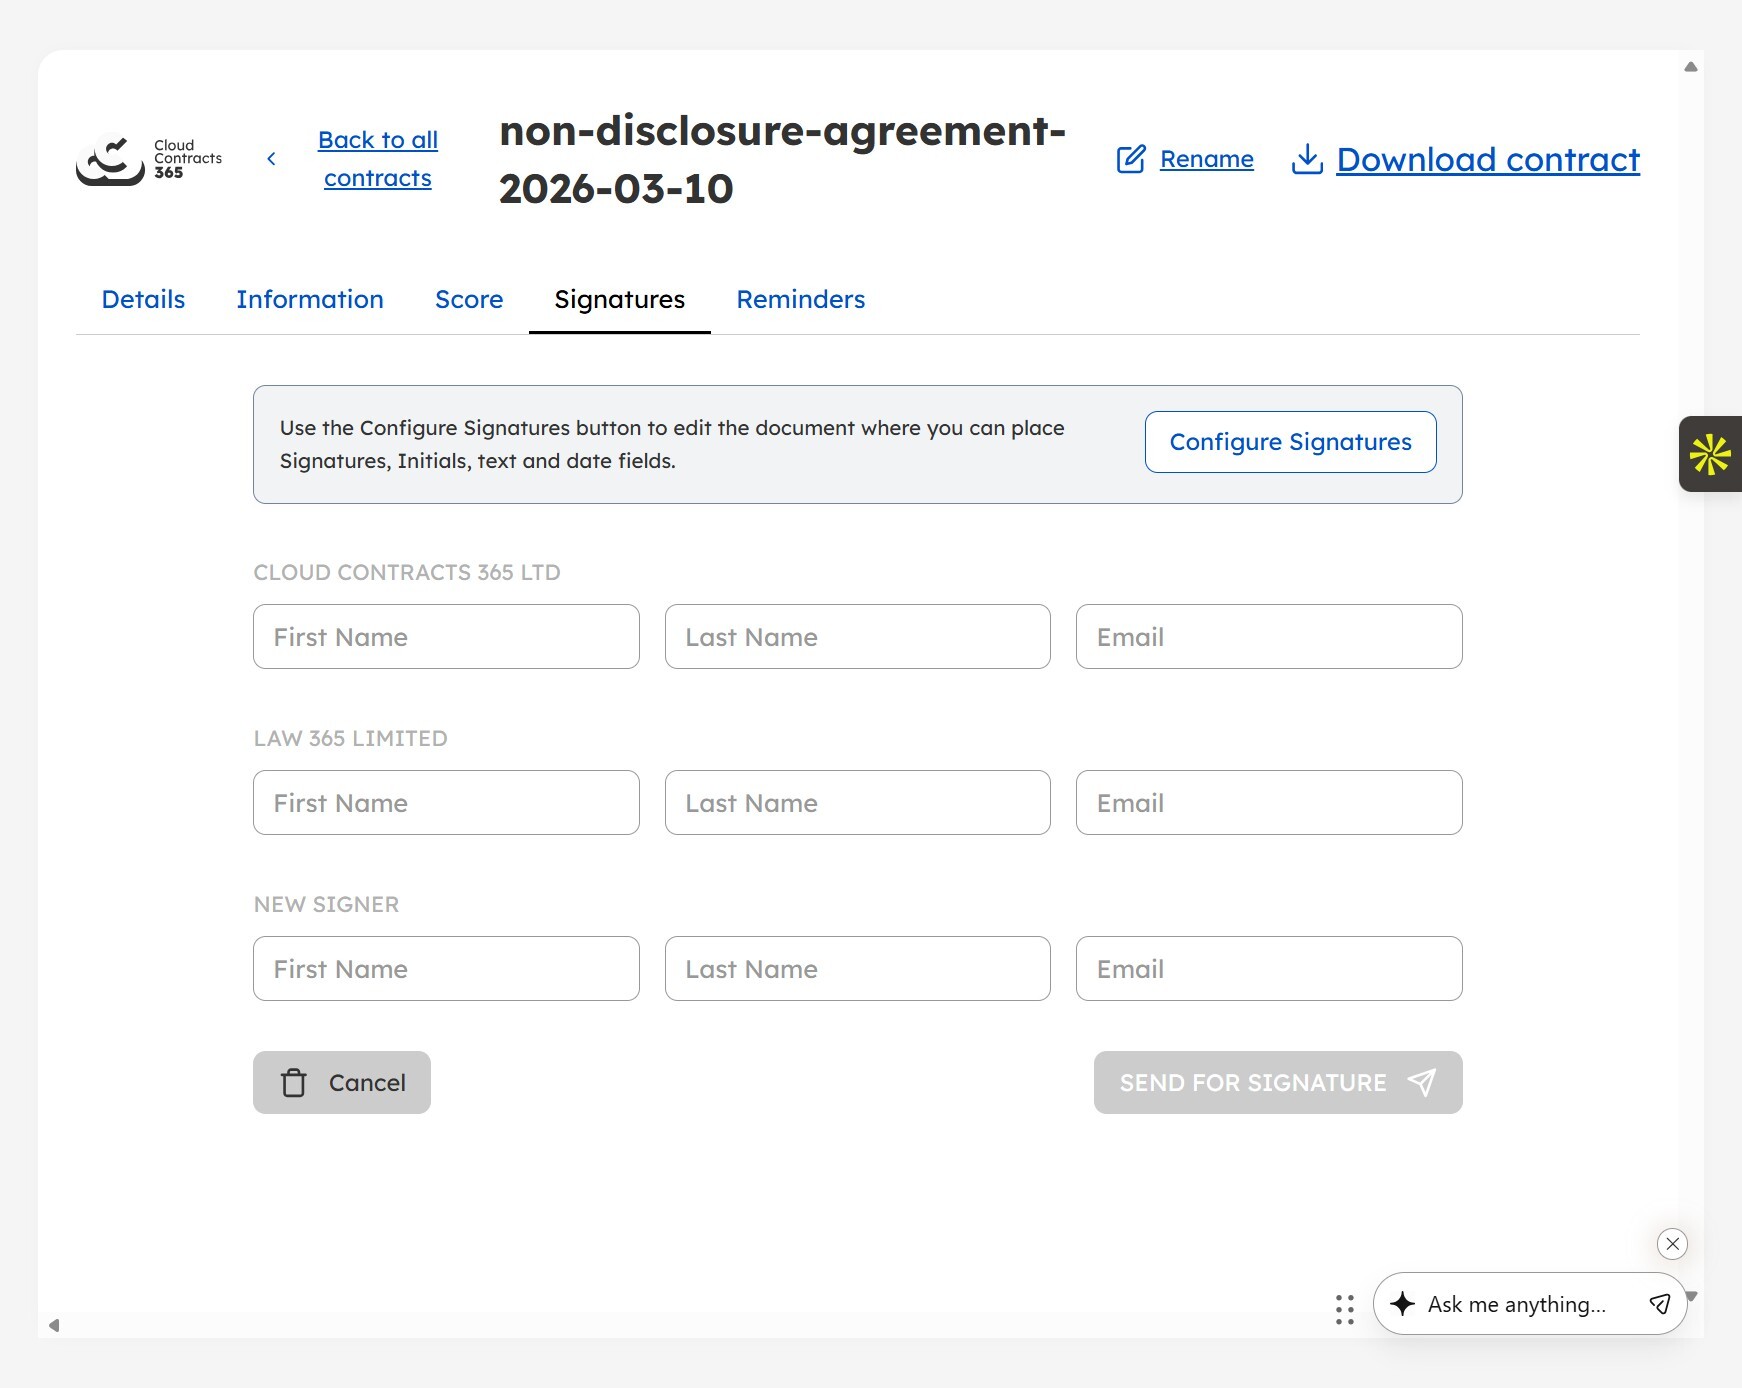
Navigate to the contract you are looking to send for signature
-
Go to the signature tab
-
Click 'Send for Signature'

-
From here, open the SignNow portal by clicking on 'Configure Signatures'

-
Once the portal has opened, click 'Manage Recipients' in the left pane

-
Click 'Add Recipient' and rename the signers by clicking the pen icon above the email box.

-
Don't worry about completing the emails; we handle that for you.
-
Click save and continue.
-
Click on the new recipient's name in the left pane and drag and drop the required fields into the correct places in the document (Signature, Text, Date, etc).

-
Click 'Save and Close' and then 'Go Back'
-
Navigate back to the Signature tab, and you will now see the additional signees' details ready to be completed and sent.

If you need any further support with the platform, please feel free to contact the team via the chat in the bottom right of your screen.
.png)


.png?width=1749&height=1743&name=NBWA%202024%20-%20Silver%20Winner%20(1).png "Award Image")
.jpg?width=800&height=906&name=1725363000656%20(1).jpg "Award Image")